兴国资源网 Design By www.nnzcdc.com
效果图可以看出灯笼的主要构成有点复杂。制作的时候先由主体部分开始,左右两侧是对称的,先制作好一部分,其它的可以复制过去。底部的装饰制作相对要难很多,尤其是线条部分,需要描成不同的颜色。
最终效果

1、新建一个800 * 800像素的文档,选择渐变工具,颜色设置为暗红至黑色,然后由中心向边角拉出径向渐变作为背景。先来制作灯笼的主体部分,如下图。

<图1>
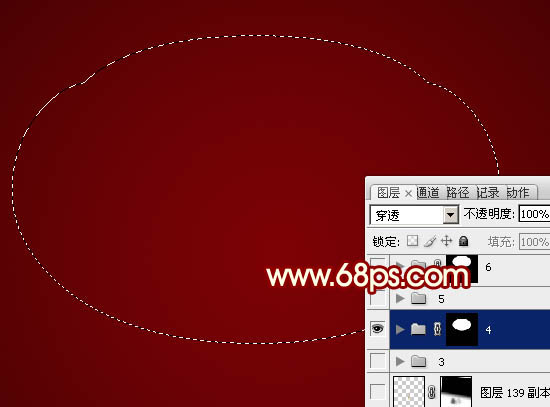
2、新建一个组,用钢笔勾出主体轮廓,转为选区后给组添加图层蒙版。也可以直接使用下图的素材,保存后用PS打开,拖进来即可使用。

<图2>
3、在组里新建一个图层,选择渐变工具,颜色设置如图3,由上至下拉出红色至深红色线性渐变。

<图3>
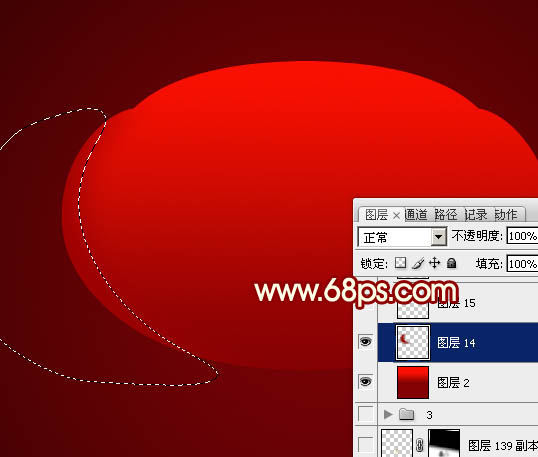
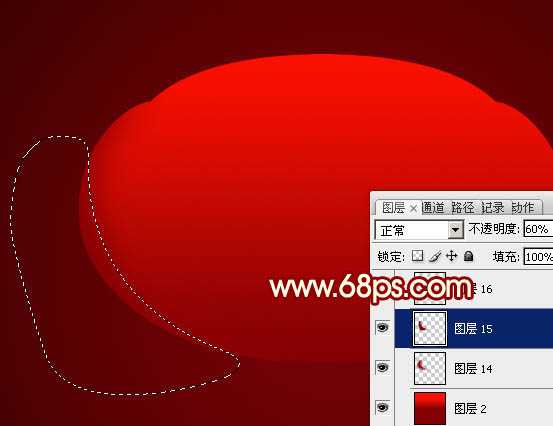
4、新建一个图层,开始制作左侧的暗部区域。先用钢笔勾出大致的暗部区域,羽化15个像素后填充暗红色。边缘及底部稍暗的部分需要再新建图层,用钢笔勾出选区,羽化后填充更暗的红色,如图4 - 6。
<图4>
<图5>

<图6>
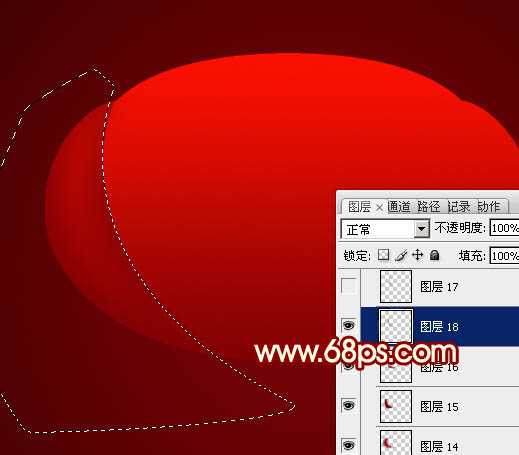
5、新建一个图层,用钢笔勾出左侧第一个褶皱选区,把前景色设置为暗红色,选择画笔工具,画笔不透明度设置为5%左右,然后用画笔在选区右侧部分涂抹,效果如下图。
<图7>
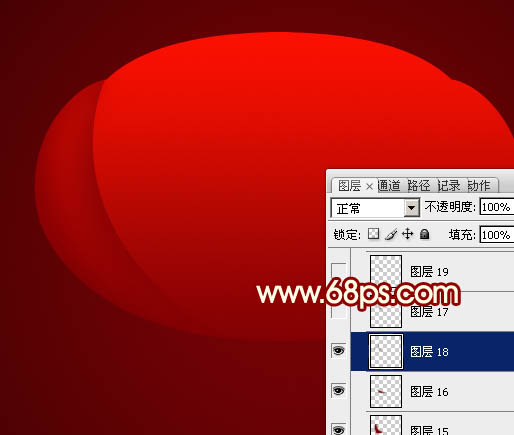
<图8>
6、新建一个图层,用钢笔勾出下图所示的选区,羽化8个像素后填充暗红色。
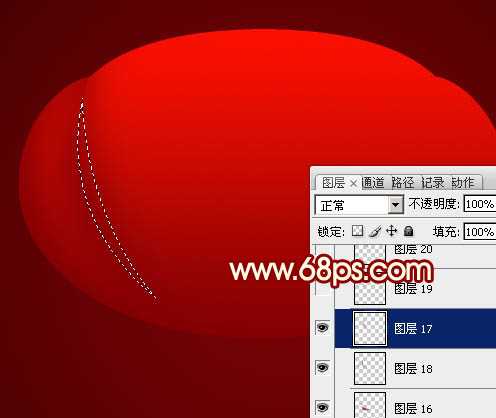
<图9>
7、新建一个图层,第二个褶皱也是同样的方法制作。

<图10>
8、新建一个图层,中间部分的褶皱也是同样的方法完成。
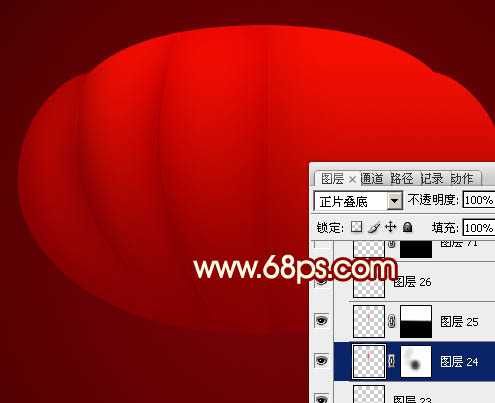
<图11>
9、新建一个图层,用钢笔勾出中间位置的高光选区,羽化6个像素后填充淡红色,如图12,13。
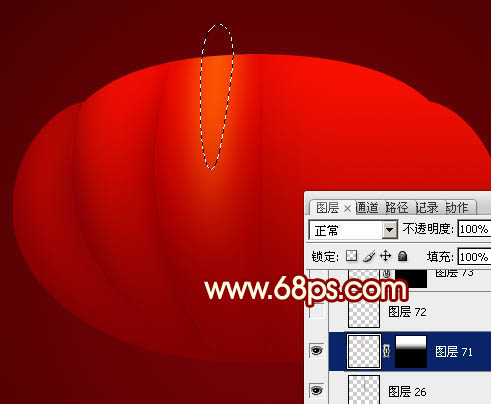
<图12>
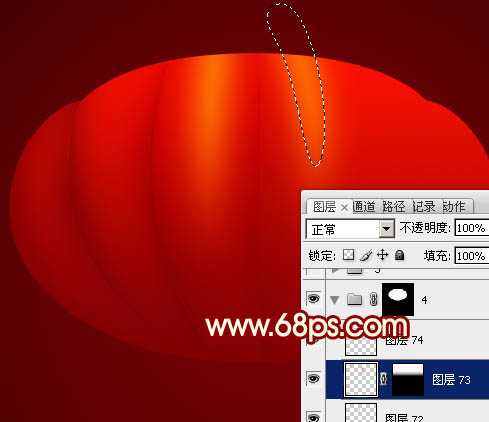
<图13>
10、新建一个图层,同样的方法制作右侧及其它部分的暗部,效果如下图。

<图14>
11、新建一个图层,现在来制作金属撑杆部分。用钢笔勾出中间撑杆的路径,转为选区后拉上图16所示的线性渐变。
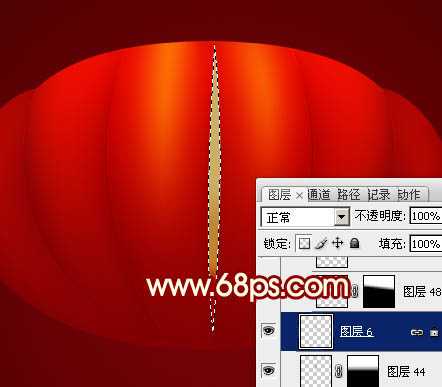
<图15>

<图16>
12、新建一个图层,按Ctrl + Alt + G 创建剪贴蒙版,选择渐变工具,颜色设置如图17,然后由下至上拉出线性渐变。确定后选择椭圆选框工具,拉出图18所示的椭圆选区,然后按Delete删除选区部分的色块。

<图17>

<图18>
13、新建一个图层,给撑杆的左侧边缘增加一点高光,右侧则增加一点阴影,如图19,20。
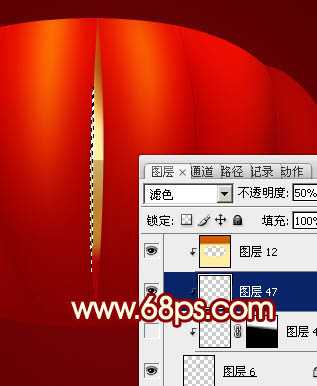
<图19>
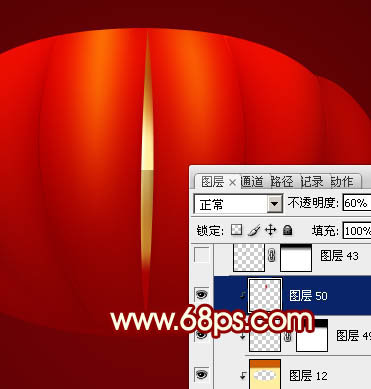
<图20>
上一页12 下一页 阅读全文
最终效果

1、新建一个800 * 800像素的文档,选择渐变工具,颜色设置为暗红至黑色,然后由中心向边角拉出径向渐变作为背景。先来制作灯笼的主体部分,如下图。

<图1>
2、新建一个组,用钢笔勾出主体轮廓,转为选区后给组添加图层蒙版。也可以直接使用下图的素材,保存后用PS打开,拖进来即可使用。


<图2>
3、在组里新建一个图层,选择渐变工具,颜色设置如图3,由上至下拉出红色至深红色线性渐变。

<图3>
4、新建一个图层,开始制作左侧的暗部区域。先用钢笔勾出大致的暗部区域,羽化15个像素后填充暗红色。边缘及底部稍暗的部分需要再新建图层,用钢笔勾出选区,羽化后填充更暗的红色,如图4 - 6。

<图4>

<图5>

<图6>
5、新建一个图层,用钢笔勾出左侧第一个褶皱选区,把前景色设置为暗红色,选择画笔工具,画笔不透明度设置为5%左右,然后用画笔在选区右侧部分涂抹,效果如下图。

<图7>

<图8>
6、新建一个图层,用钢笔勾出下图所示的选区,羽化8个像素后填充暗红色。

<图9>
7、新建一个图层,第二个褶皱也是同样的方法制作。

<图10>
8、新建一个图层,中间部分的褶皱也是同样的方法完成。

<图11>
9、新建一个图层,用钢笔勾出中间位置的高光选区,羽化6个像素后填充淡红色,如图12,13。

<图12>

<图13>
10、新建一个图层,同样的方法制作右侧及其它部分的暗部,效果如下图。

<图14>
11、新建一个图层,现在来制作金属撑杆部分。用钢笔勾出中间撑杆的路径,转为选区后拉上图16所示的线性渐变。

<图15>

<图16>
12、新建一个图层,按Ctrl + Alt + G 创建剪贴蒙版,选择渐变工具,颜色设置如图17,然后由下至上拉出线性渐变。确定后选择椭圆选框工具,拉出图18所示的椭圆选区,然后按Delete删除选区部分的色块。

<图17>

<图18>
13、新建一个图层,给撑杆的左侧边缘增加一点高光,右侧则增加一点阴影,如图19,20。

<图19>

<图20>
上一页12 下一页 阅读全文
兴国资源网 Design By www.nnzcdc.com
广告合作:本站广告合作请联系QQ:858582 申请时备注:广告合作(否则不回)
免责声明:本站资源来自互联网收集,仅供用于学习和交流,请遵循相关法律法规,本站一切资源不代表本站立场,如有侵权、后门、不妥请联系本站删除!
免责声明:本站资源来自互联网收集,仅供用于学习和交流,请遵循相关法律法规,本站一切资源不代表本站立场,如有侵权、后门、不妥请联系本站删除!
兴国资源网 Design By www.nnzcdc.com
暂无评论...
P70系列延期,华为新旗舰将在下月发布
3月20日消息,近期博主@数码闲聊站 透露,原定三月份发布的华为新旗舰P70系列延期发布,预计4月份上市。
而博主@定焦数码 爆料,华为的P70系列在定位上已经超过了Mate60,成为了重要的旗舰系列之一。它肩负着重返影像领域顶尖的使命。那么这次P70会带来哪些令人惊艳的创新呢?
根据目前爆料的消息来看,华为P70系列将推出三个版本,其中P70和P70 Pro采用了三角形的摄像头模组设计,而P70 Art则采用了与上一代P60 Art相似的不规则形状设计。这样的外观是否好看见仁见智,但辨识度绝对拉满。
更新日志
2025年02月27日
2025年02月27日
- 小骆驼-《草原狼2(蓝光CD)》[原抓WAV+CUE]
- 群星《欢迎来到我身边 电影原声专辑》[320K/MP3][105.02MB]
- 群星《欢迎来到我身边 电影原声专辑》[FLAC/分轨][480.9MB]
- 雷婷《梦里蓝天HQⅡ》 2023头版限量编号低速原抓[WAV+CUE][463M]
- 群星《2024好听新歌42》AI调整音效【WAV分轨】
- 王思雨-《思念陪着鸿雁飞》WAV
- 王思雨《喜马拉雅HQ》头版限量编号[WAV+CUE]
- 李健《无时无刻》[WAV+CUE][590M]
- 陈奕迅《酝酿》[WAV分轨][502M]
- 卓依婷《化蝶》2CD[WAV+CUE][1.1G]
- 群星《吉他王(黑胶CD)》[WAV+CUE]
- 齐秦《穿乐(穿越)》[WAV+CUE]
- 发烧珍品《数位CD音响测试-动向效果(九)》【WAV+CUE】
- 邝美云《邝美云精装歌集》[DSF][1.6G]
- 吕方《爱一回伤一回》[WAV+CUE][454M]
