兴国资源网 Design By www.nnzcdc.com
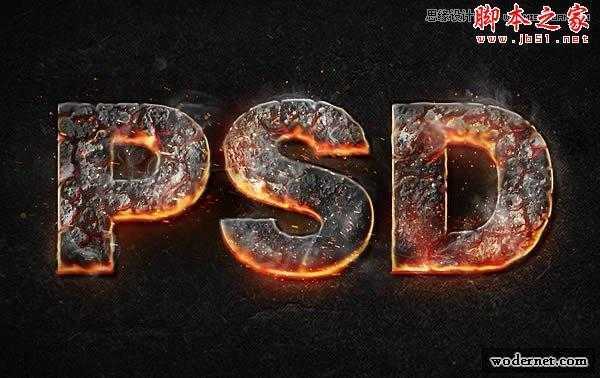
最终效果:
1、打开文本,使用字体Helvetica LT Std输入文字,窗口-字体中,打开的字体面板,将文字的大小改为425PT,并将字间距改为-25.
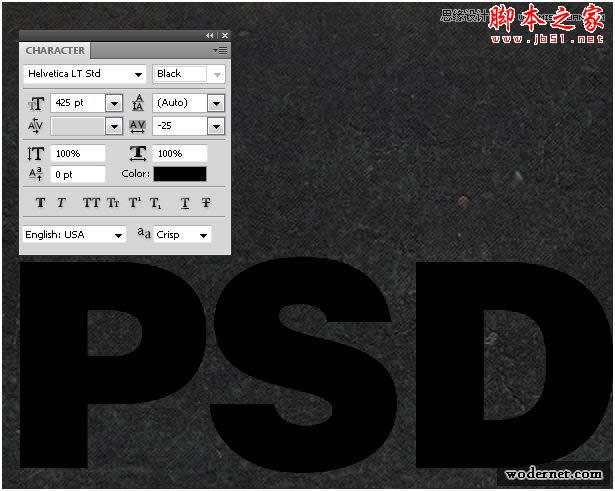
图1
请注意字母“D”还是有点接近的字母“S”"609" width="636" border="0" src="/UploadFiles/2021-04-17/2013041408083427.jpg">
图2
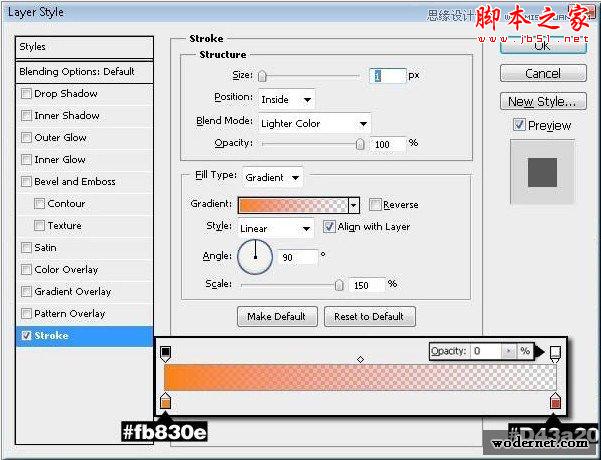
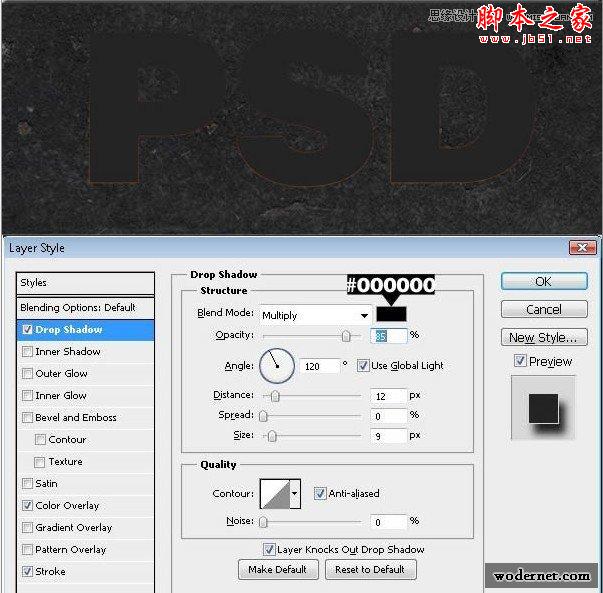
3、双击文字图层,打开图层样式面板,应用描边,将描边的填充类型为渐变,渐变颜色设置如下:
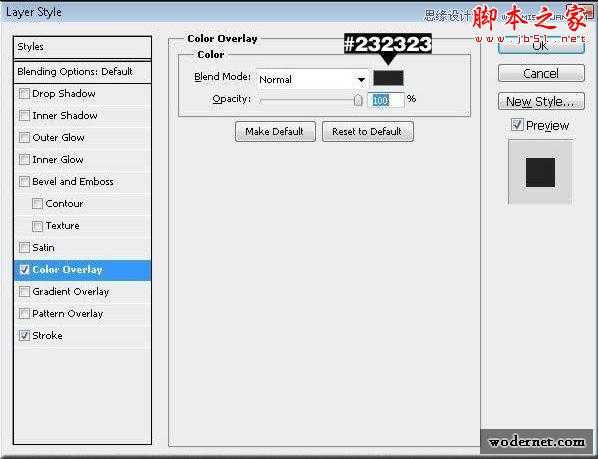
颜色叠加:
投影
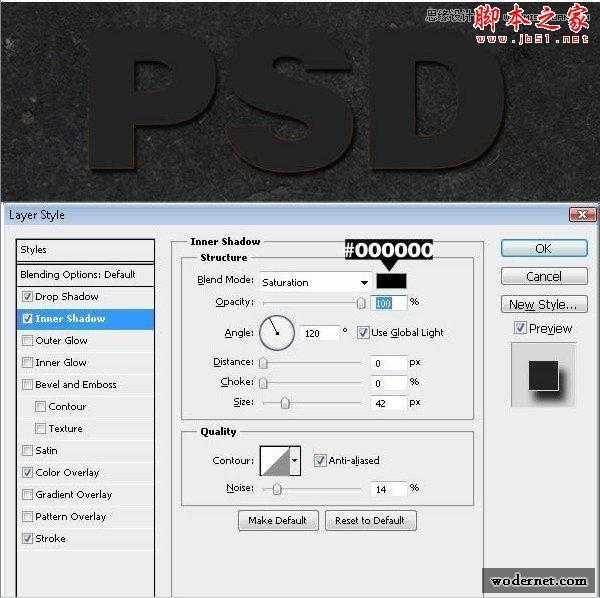
内阴影
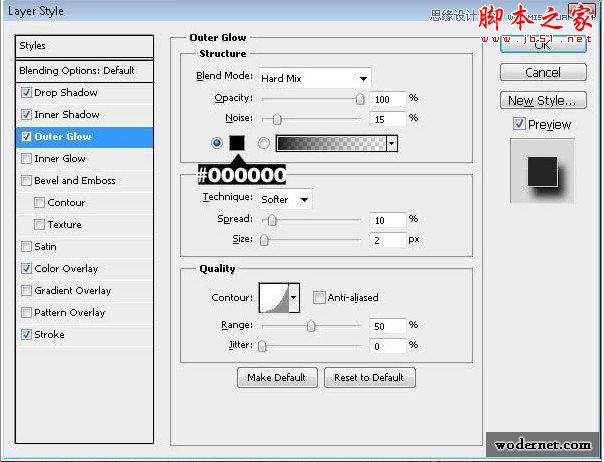
外发光
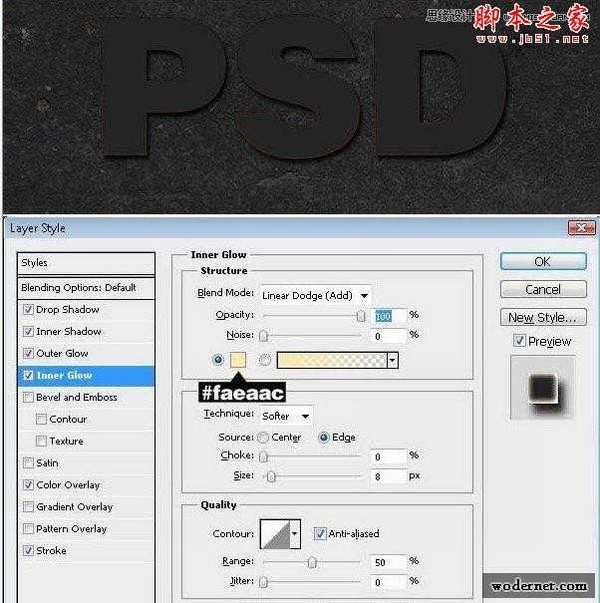
内发光
斜面与浮雕
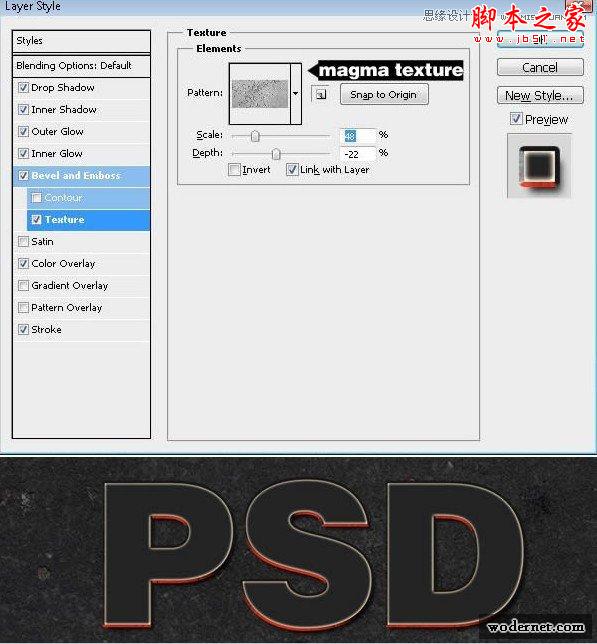
4、按下CTRL+J复制得到文字图层, 左击在快捷菜单中选择清除图层样式,这样可以保证下面要增加文字的样式是在同样的文字上增加的。混合选项:
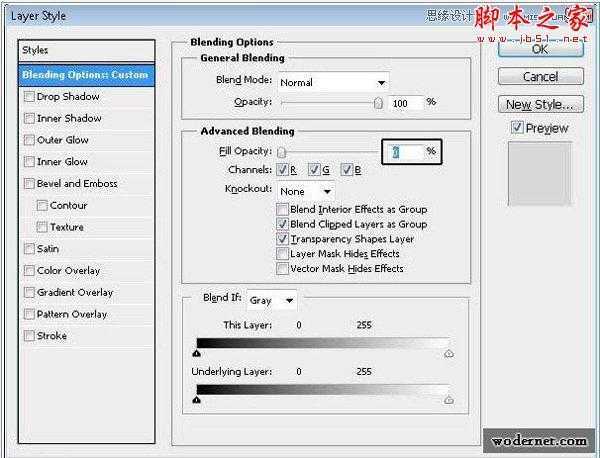
内阴影
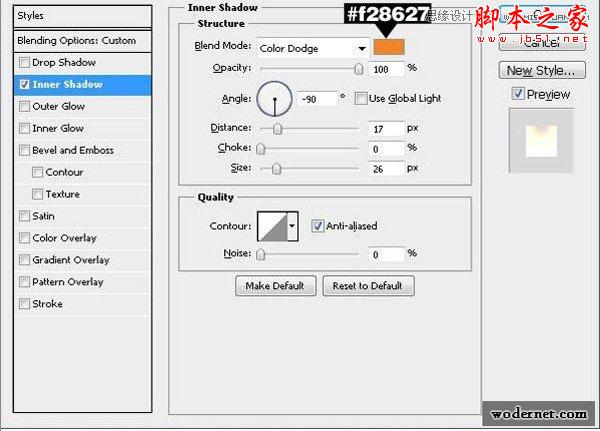

内发光
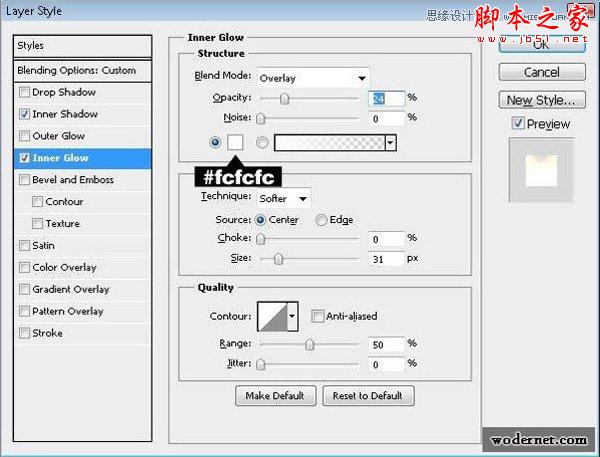

斜面与浮雕
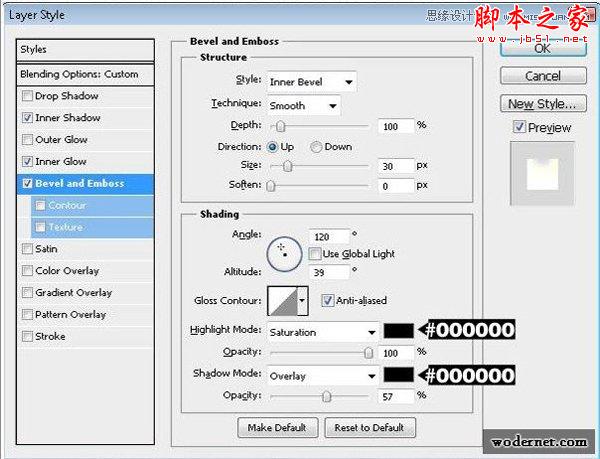

图案叠加
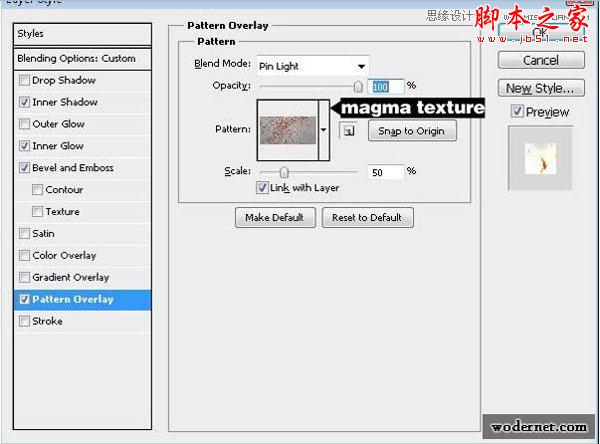
效果图:

5、将岩浆纹理放在背景图层中,窗口-调整-创建渐变映射,渐变设置如下图所示:
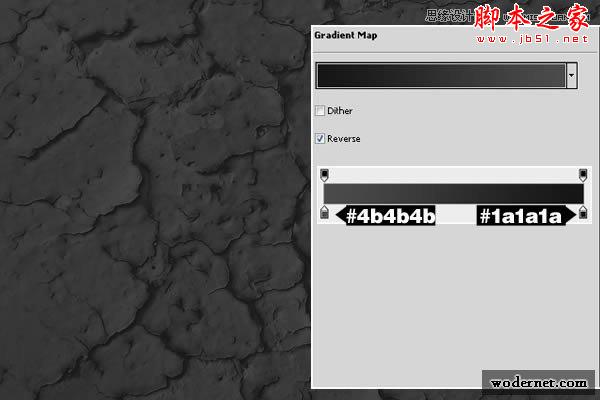
图5
6、将文字图层的混合模式改为线性减淡(增加)。不透明为36%.这将使文字增加了背景图层的
纹理。使用硬度为0的橡皮擦擦去一些边缘地方,使文字有明暗变化。
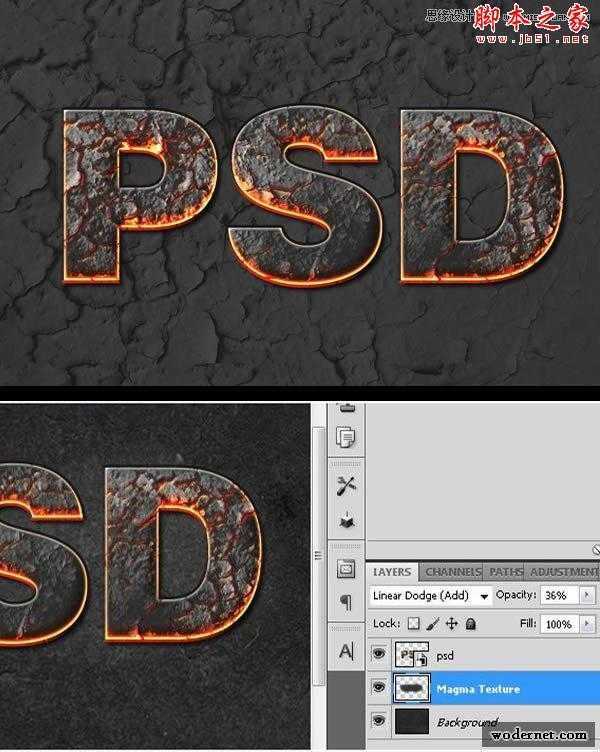
图6
7、选择“PSD”文字图层,右键单击并选择“转换为智能对象”创建一个新的图层“阴影”,使
用画笔工具(B)为文字下面添加一些阴影:用黑色画笔工具(B)与硬度为0%和尺寸约280px。
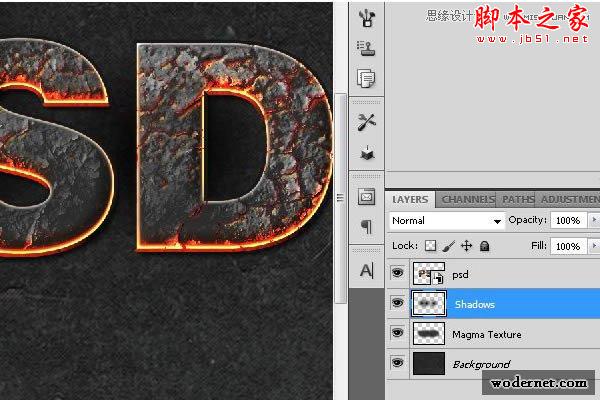
图7
8、现在,再次使用画笔工具(B)添加一些橙色的亮点,应用高斯模糊,改变混合模式为“线性减
淡(添加)”,不透明度45%左右。
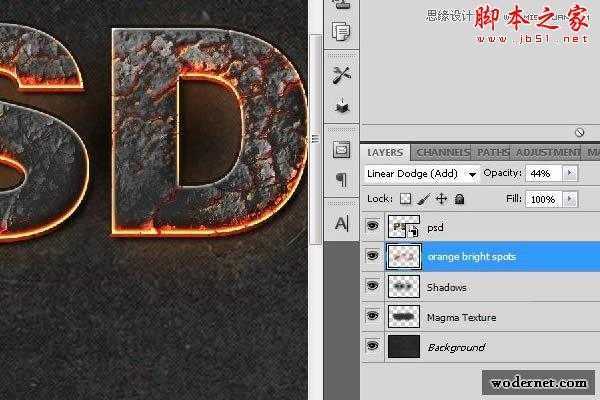
图8
9、选择“PSD”智能对象,复制它,把它称为“模糊层”,最后“栅格化”(右键单击>“栅格化”)。我们要的文字边缘模糊做出燃烧中并且非常热的效果。我们将使用涂抹工具(R),30%的流量,用圆形笔刷,硬度为0%。绘画文字边缘,使他们像正在熔化。
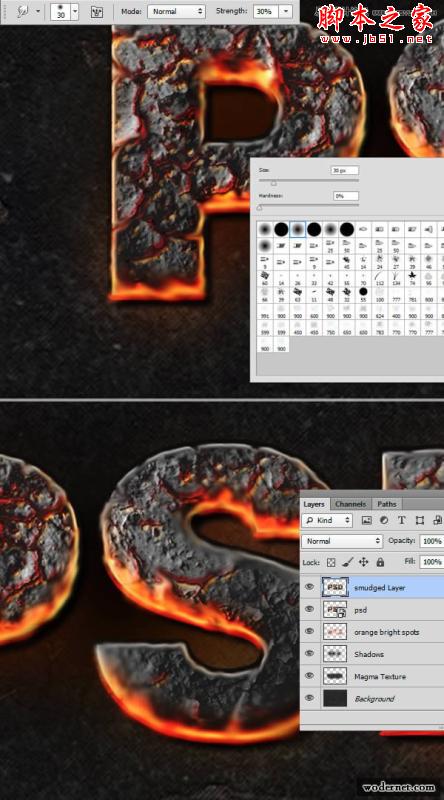
图9
10、继续模糊这个图层,使用一个更大的涂抹画笔,涂抹橙色的区域,并对这图层应用曲线调整,增加对比度。
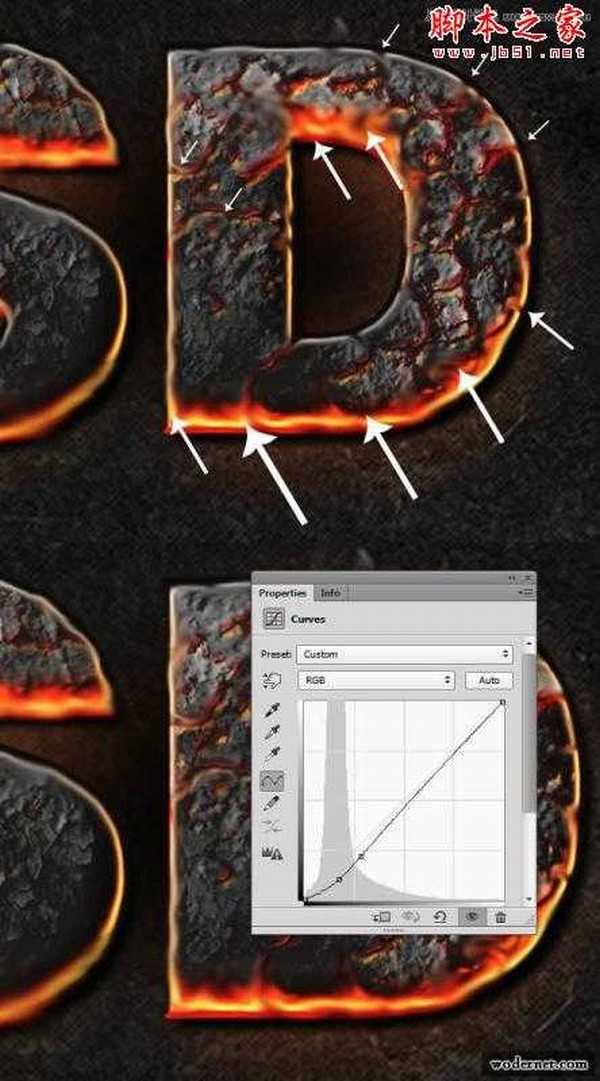
图10
11、创建新图层,使用黑色硬度为0的画笔,为文字增加一些阴影,如下图所示,将图层不透明改为40%。
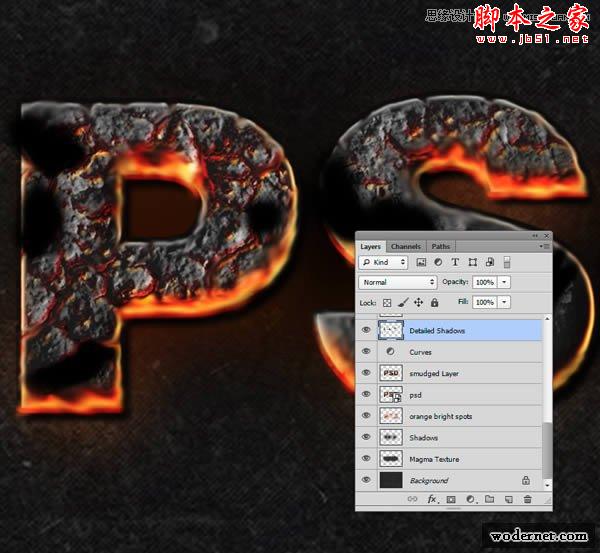
图11
12、继续使用画笔,将画笔的颜色改为橙色,创建新图层,为文字增加一些橙色,如下图所示,将图层的混合模式改为颜色减淡。滤镜-模糊-高斯模糊。
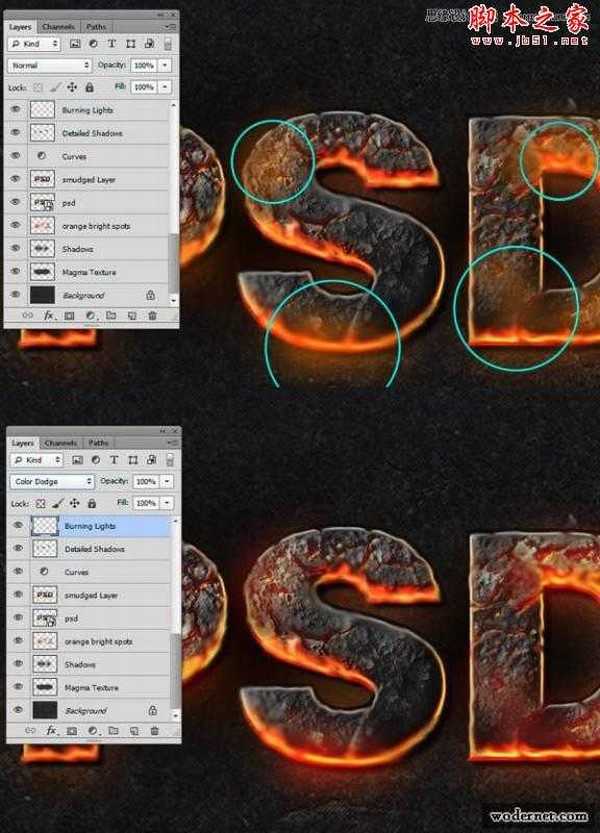
图12
13、在所有图层之上,增加新图层,并使用白色画笔画出如下所示的高光。将图层的混合模式改为叠加。
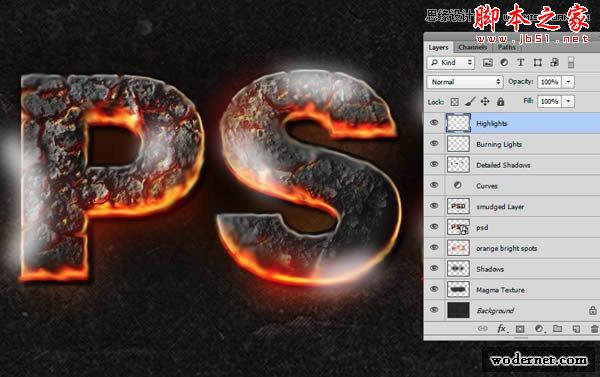
图13
14、增加烟雾效果。打开烟雾图片,图像-调整-去色,使用橡皮擦擦去不需要的部分,按下CTRL+T,对图片进行变换,使之与文字更好的融合。图层的混合模式为滤色。
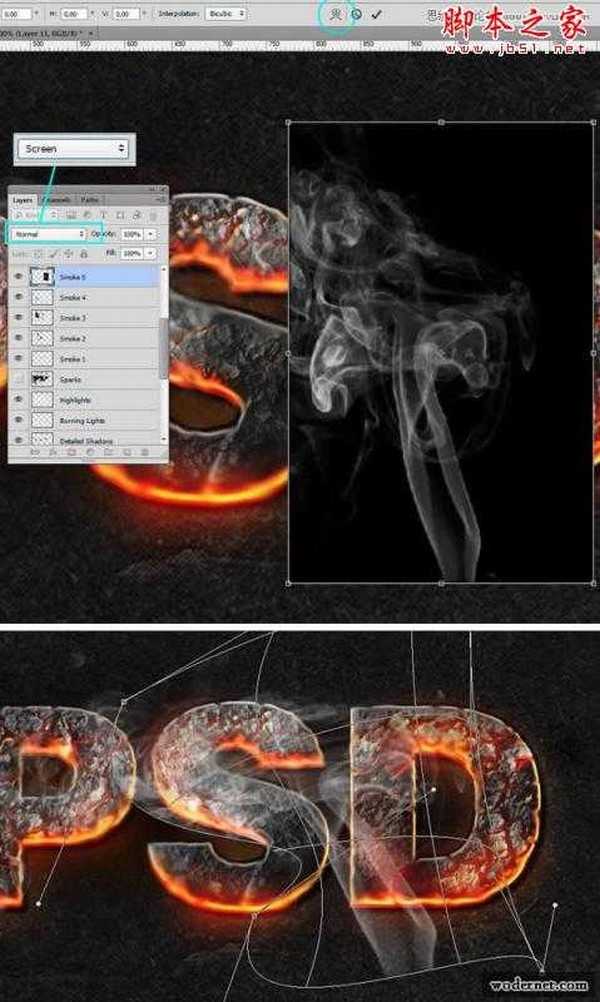
图14
15、继续添加更多的照片烟雾的组成:变形和涂抹,这部分主要是实验性的继续尝试,直到你得到一个满意的结果。
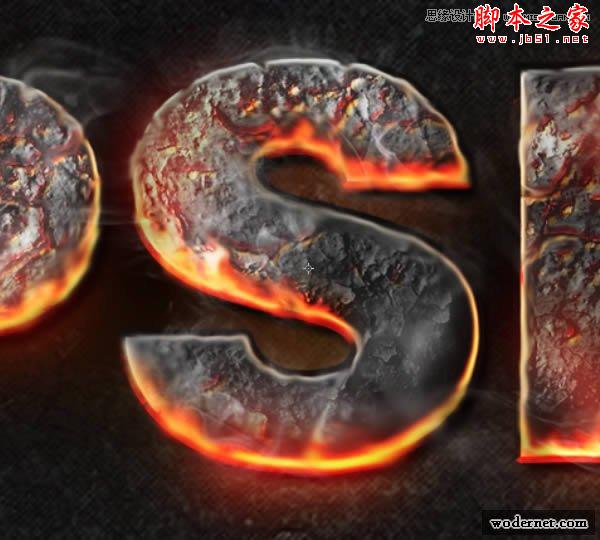
16、将火花图片放入到文档中,切换的火花层的混合模式为“颜色减淡”,然后使用图层蒙版删除一些区域,特别是那些以外的字母,因为我们不需要那么多。
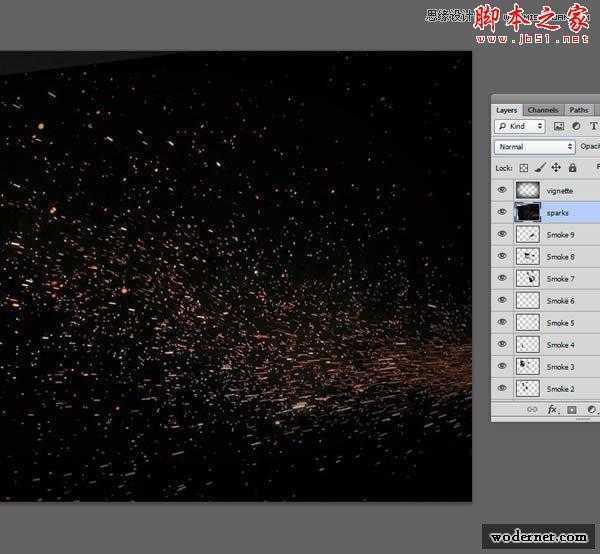
图16
17、下面你可以看到图层蒙版(左)涂抹最终的效果(右)要查看图层蒙版ALT+单击其缩略图上。
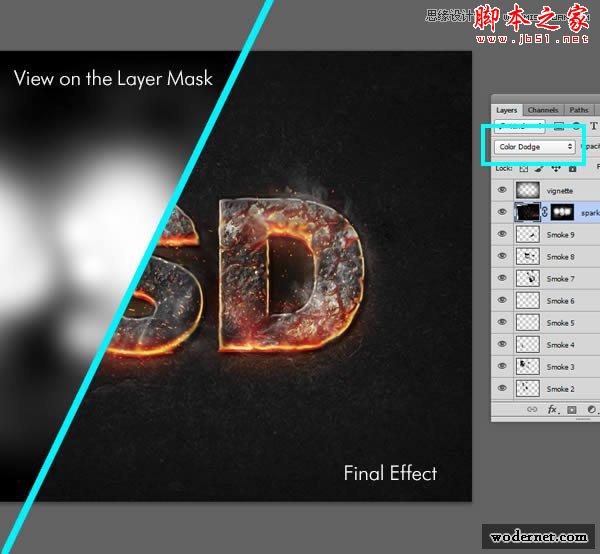
图17
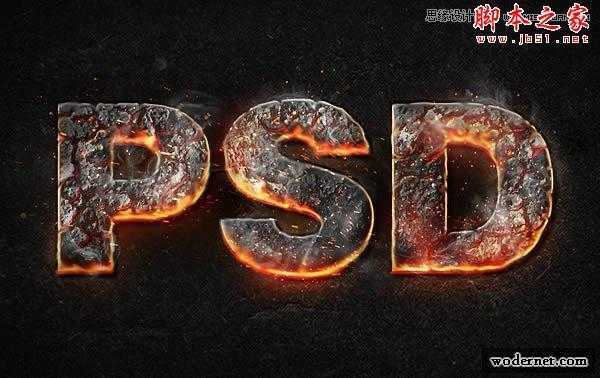
最终效果:

1、打开文本,使用字体Helvetica LT Std输入文字,窗口-字体中,打开的字体面板,将文字的大小改为425PT,并将字间距改为-25.

图1
请注意字母“D”还是有点接近的字母“S”"609" width="636" border="0" src="/UploadFiles/2021-04-17/2013041408083427.jpg">
图2
3、双击文字图层,打开图层样式面板,应用描边,将描边的填充类型为渐变,渐变颜色设置如下:

颜色叠加:

投影

内阴影

外发光

内发光

斜面与浮雕

4、按下CTRL+J复制得到文字图层, 左击在快捷菜单中选择清除图层样式,这样可以保证下面要增加文字的样式是在同样的文字上增加的。混合选项:

内阴影


内发光


斜面与浮雕


图案叠加

效果图:

5、将岩浆纹理放在背景图层中,窗口-调整-创建渐变映射,渐变设置如下图所示:

图5
6、将文字图层的混合模式改为线性减淡(增加)。不透明为36%.这将使文字增加了背景图层的
纹理。使用硬度为0的橡皮擦擦去一些边缘地方,使文字有明暗变化。

图6
7、选择“PSD”文字图层,右键单击并选择“转换为智能对象”创建一个新的图层“阴影”,使
用画笔工具(B)为文字下面添加一些阴影:用黑色画笔工具(B)与硬度为0%和尺寸约280px。

图7
8、现在,再次使用画笔工具(B)添加一些橙色的亮点,应用高斯模糊,改变混合模式为“线性减
淡(添加)”,不透明度45%左右。

图8
9、选择“PSD”智能对象,复制它,把它称为“模糊层”,最后“栅格化”(右键单击>“栅格化”)。我们要的文字边缘模糊做出燃烧中并且非常热的效果。我们将使用涂抹工具(R),30%的流量,用圆形笔刷,硬度为0%。绘画文字边缘,使他们像正在熔化。

图9
10、继续模糊这个图层,使用一个更大的涂抹画笔,涂抹橙色的区域,并对这图层应用曲线调整,增加对比度。

图10
11、创建新图层,使用黑色硬度为0的画笔,为文字增加一些阴影,如下图所示,将图层不透明改为40%。

图11
12、继续使用画笔,将画笔的颜色改为橙色,创建新图层,为文字增加一些橙色,如下图所示,将图层的混合模式改为颜色减淡。滤镜-模糊-高斯模糊。

图12
13、在所有图层之上,增加新图层,并使用白色画笔画出如下所示的高光。将图层的混合模式改为叠加。

图13
14、增加烟雾效果。打开烟雾图片,图像-调整-去色,使用橡皮擦擦去不需要的部分,按下CTRL+T,对图片进行变换,使之与文字更好的融合。图层的混合模式为滤色。

图14
15、继续添加更多的照片烟雾的组成:变形和涂抹,这部分主要是实验性的继续尝试,直到你得到一个满意的结果。

16、将火花图片放入到文档中,切换的火花层的混合模式为“颜色减淡”,然后使用图层蒙版删除一些区域,特别是那些以外的字母,因为我们不需要那么多。

图16
17、下面你可以看到图层蒙版(左)涂抹最终的效果(右)要查看图层蒙版ALT+单击其缩略图上。

图17
最终效果:

兴国资源网 Design By www.nnzcdc.com
广告合作:本站广告合作请联系QQ:858582 申请时备注:广告合作(否则不回)
免责声明:本站资源来自互联网收集,仅供用于学习和交流,请遵循相关法律法规,本站一切资源不代表本站立场,如有侵权、后门、不妥请联系本站删除!
免责声明:本站资源来自互联网收集,仅供用于学习和交流,请遵循相关法律法规,本站一切资源不代表本站立场,如有侵权、后门、不妥请联系本站删除!
兴国资源网 Design By www.nnzcdc.com
暂无评论...
稳了!魔兽国服回归的3条重磅消息!官宣时间再确认!
昨天有一位朋友在大神群里分享,自己亚服账号被封号之后居然弹出了国服的封号信息对话框。
这里面让他访问的是一个国服的战网网址,com.cn和后面的zh都非常明白地表明这就是国服战网。
而他在复制这个网址并且进行登录之后,确实是网易的网址,也就是我们熟悉的停服之后国服发布的暴雪游戏产品运营到期开放退款的说明。这是一件比较奇怪的事情,因为以前都没有出现这样的情况,现在突然提示跳转到国服战网的网址,是不是说明了简体中文客户端已经开始进行更新了呢?
更新日志
2025年02月25日
2025年02月25日
- 小骆驼-《草原狼2(蓝光CD)》[原抓WAV+CUE]
- 群星《欢迎来到我身边 电影原声专辑》[320K/MP3][105.02MB]
- 群星《欢迎来到我身边 电影原声专辑》[FLAC/分轨][480.9MB]
- 雷婷《梦里蓝天HQⅡ》 2023头版限量编号低速原抓[WAV+CUE][463M]
- 群星《2024好听新歌42》AI调整音效【WAV分轨】
- 王思雨-《思念陪着鸿雁飞》WAV
- 王思雨《喜马拉雅HQ》头版限量编号[WAV+CUE]
- 李健《无时无刻》[WAV+CUE][590M]
- 陈奕迅《酝酿》[WAV分轨][502M]
- 卓依婷《化蝶》2CD[WAV+CUE][1.1G]
- 群星《吉他王(黑胶CD)》[WAV+CUE]
- 齐秦《穿乐(穿越)》[WAV+CUE]
- 发烧珍品《数位CD音响测试-动向效果(九)》【WAV+CUE】
- 邝美云《邝美云精装歌集》[DSF][1.6G]
- 吕方《爱一回伤一回》[WAV+CUE][454M]
