兴国资源网 Design By www.nnzcdc.com
原图

<点小图查看大图>
最终效果
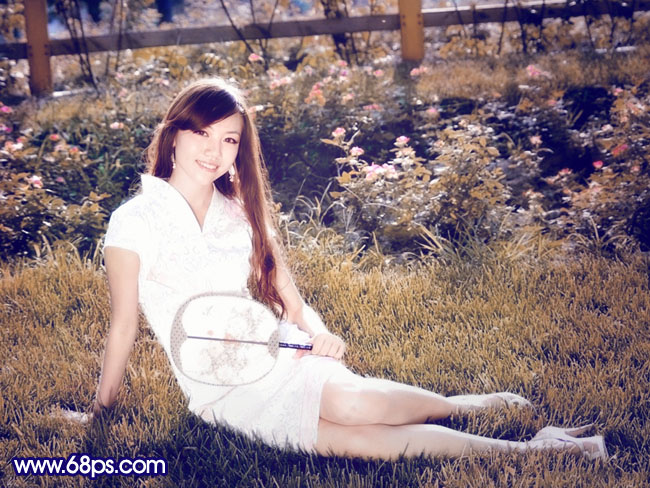
<点小图查看大图> 1、打开原图素材,创建色相/饱和度调整图层,选择黄色,用吸管点背景部分的草地,吸取颜色,然后适当调整,参数设置如图1,效果如图2。
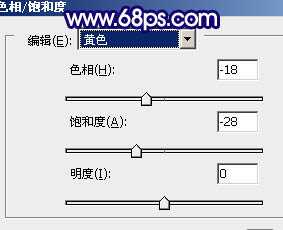
<图1>

<图2>
2、按Ctrl + J把当前色相/饱和度调整图层复制一层,加强一下颜色,效果如下图。
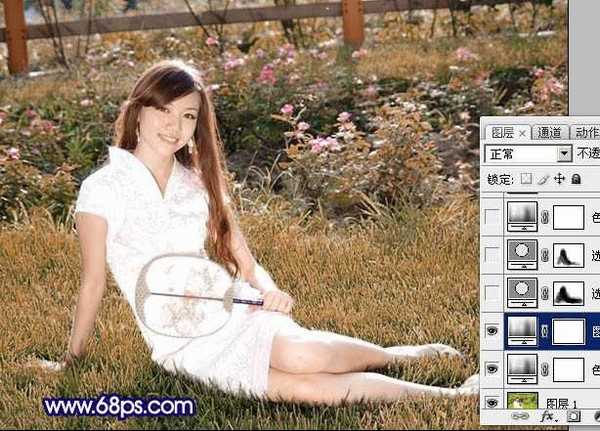
<图3> 3、创建可选颜色调整图层,对红,黄,中性色进行调整,参数设置如图4 - 6,确定后用黑色画笔把人物部分擦出来,效果如图7。

<图4>

<图5>
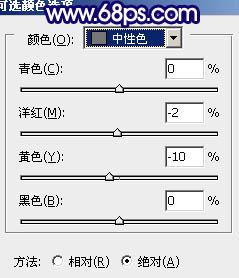
<图6>

<图7> 4、再创建可选颜色调整图层,对红,黄,进行调整,参数设置如图8 - 9,确定后用黑色画笔把人物部分擦出来,效果如图10。
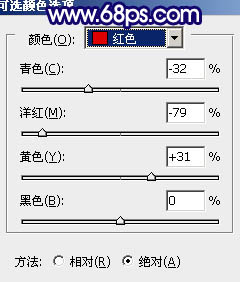
<图8>

<图9>
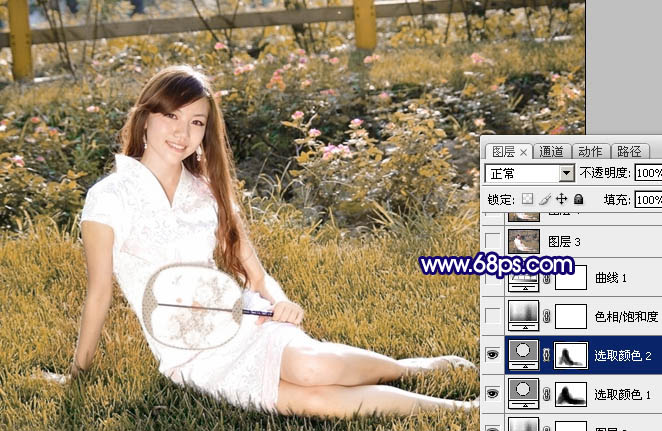
<图10> 5、创建色相/饱和度调整图层,选择黄色,再用吸管吸取背景颜色调整,参数设置如图11,效果如图12。

<图11>
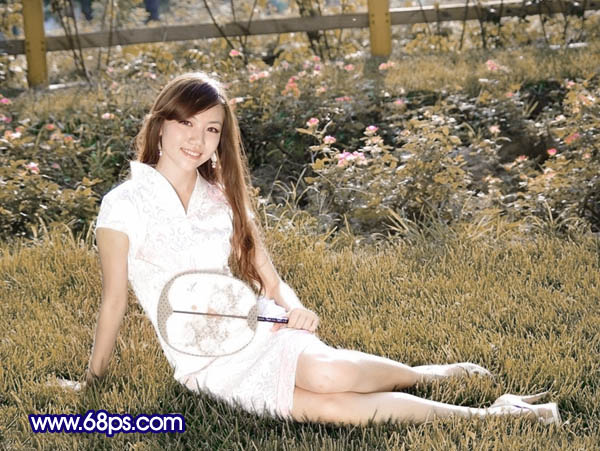
<图12>
6、创建曲线调整图层,对蓝色进行调整,参数设置如图13,效果如图14。
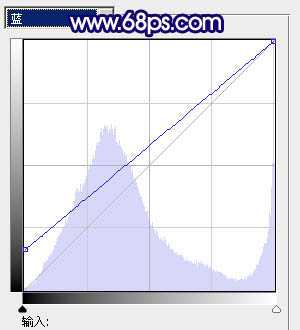
<图13>

<图14>
上一页12 下一页 阅读全文

<点小图查看大图>
最终效果

<点小图查看大图> 1、打开原图素材,创建色相/饱和度调整图层,选择黄色,用吸管点背景部分的草地,吸取颜色,然后适当调整,参数设置如图1,效果如图2。

<图1>

<图2>
2、按Ctrl + J把当前色相/饱和度调整图层复制一层,加强一下颜色,效果如下图。

<图3> 3、创建可选颜色调整图层,对红,黄,中性色进行调整,参数设置如图4 - 6,确定后用黑色画笔把人物部分擦出来,效果如图7。

<图4>

<图5>

<图6>

<图7> 4、再创建可选颜色调整图层,对红,黄,进行调整,参数设置如图8 - 9,确定后用黑色画笔把人物部分擦出来,效果如图10。

<图8>

<图9>

<图10> 5、创建色相/饱和度调整图层,选择黄色,再用吸管吸取背景颜色调整,参数设置如图11,效果如图12。

<图11>

<图12>
6、创建曲线调整图层,对蓝色进行调整,参数设置如图13,效果如图14。

<图13>

<图14>
上一页12 下一页 阅读全文
兴国资源网 Design By www.nnzcdc.com
广告合作:本站广告合作请联系QQ:858582 申请时备注:广告合作(否则不回)
免责声明:本站资源来自互联网收集,仅供用于学习和交流,请遵循相关法律法规,本站一切资源不代表本站立场,如有侵权、后门、不妥请联系本站删除!
免责声明:本站资源来自互联网收集,仅供用于学习和交流,请遵循相关法律法规,本站一切资源不代表本站立场,如有侵权、后门、不妥请联系本站删除!
兴国资源网 Design By www.nnzcdc.com
暂无评论...
更新日志
2025年02月24日
2025年02月24日
- 小骆驼-《草原狼2(蓝光CD)》[原抓WAV+CUE]
- 群星《欢迎来到我身边 电影原声专辑》[320K/MP3][105.02MB]
- 群星《欢迎来到我身边 电影原声专辑》[FLAC/分轨][480.9MB]
- 雷婷《梦里蓝天HQⅡ》 2023头版限量编号低速原抓[WAV+CUE][463M]
- 群星《2024好听新歌42》AI调整音效【WAV分轨】
- 王思雨-《思念陪着鸿雁飞》WAV
- 王思雨《喜马拉雅HQ》头版限量编号[WAV+CUE]
- 李健《无时无刻》[WAV+CUE][590M]
- 陈奕迅《酝酿》[WAV分轨][502M]
- 卓依婷《化蝶》2CD[WAV+CUE][1.1G]
- 群星《吉他王(黑胶CD)》[WAV+CUE]
- 齐秦《穿乐(穿越)》[WAV+CUE]
- 发烧珍品《数位CD音响测试-动向效果(九)》【WAV+CUE】
- 邝美云《邝美云精装歌集》[DSF][1.6G]
- 吕方《爱一回伤一回》[WAV+CUE][454M]
