兴国资源网 Design By www.nnzcdc.com
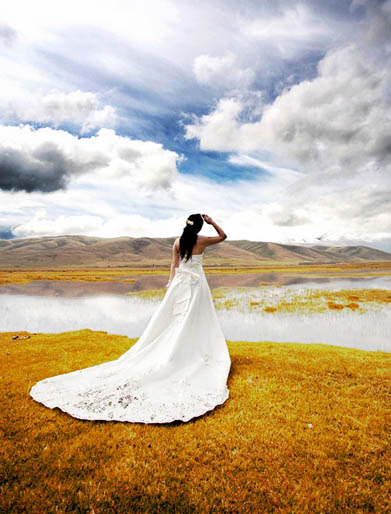
原图
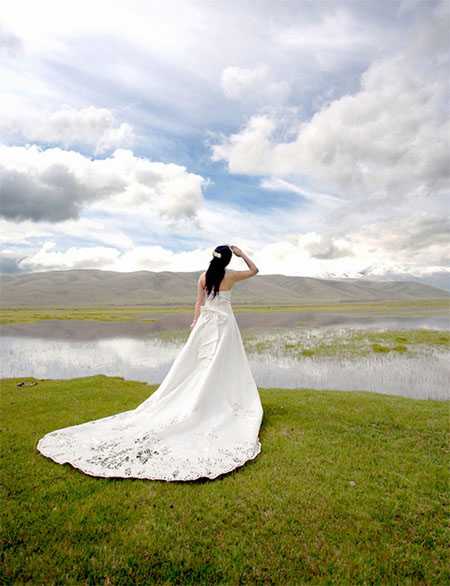
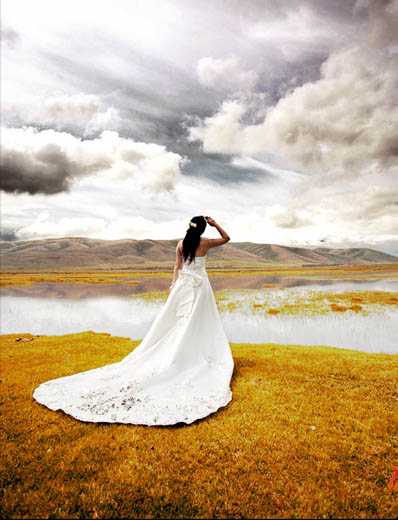
最终效果

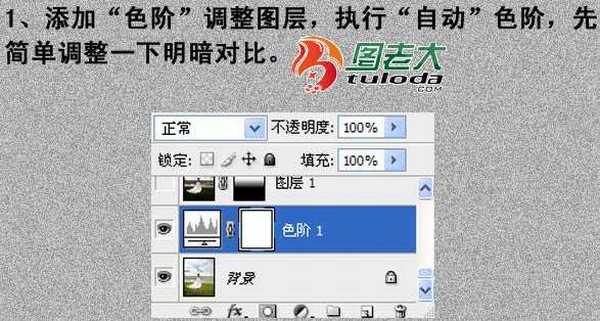
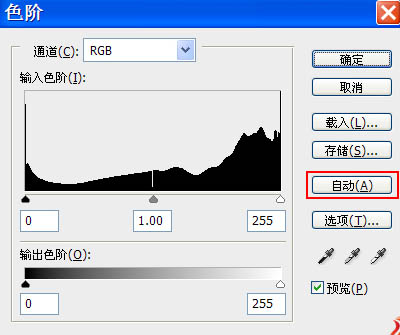
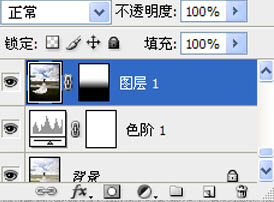
1、打开原图素材,创建色阶调整图层,选择自动按钮,简单调整一下明暗对比。
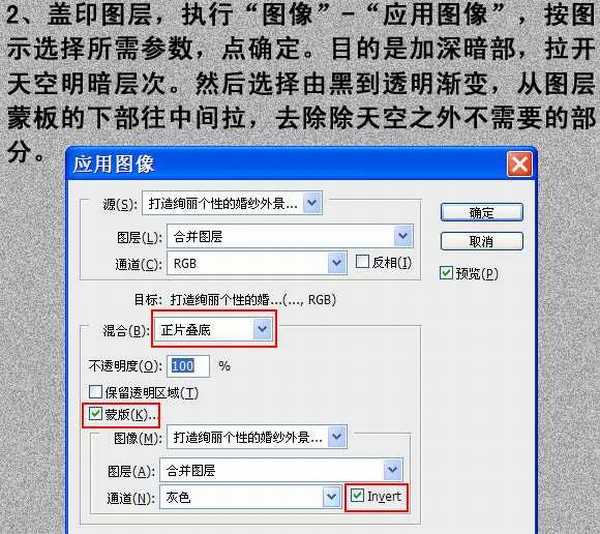
2、新建一个图层,按Ctrl + Alt + Shift + E 盖印图层。执行:图像 > 应用图像,参数设置如下图。目的是加深暗部,拉开天空明暗层次。然后选择由黑道透明渐变,从图层蒙版的下部往中间拉,去除除天空之外不需要的部分。

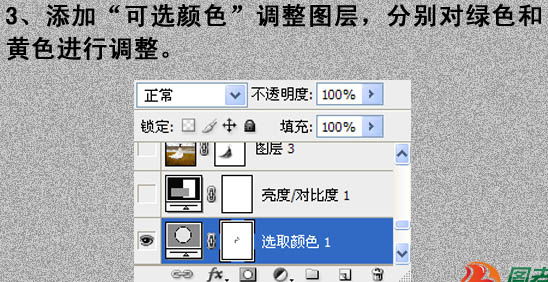
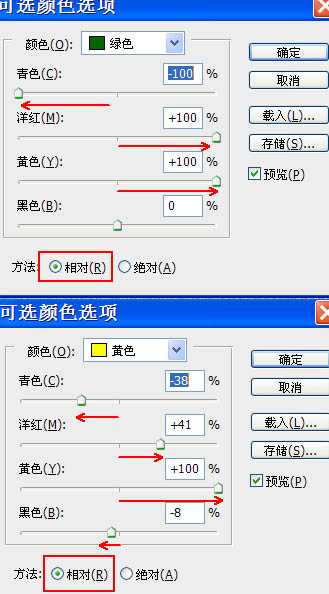
3、创建可选颜色调整图层,对绿色和黄色进行调整,参数设置如下图。

4、创建亮度/对比度调整图层,将画面稍微调亮一点,参数设置如下图。


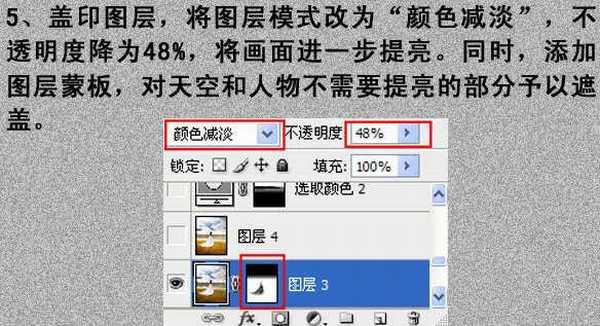
5、新建一个图层,盖印图层。图层混合模式改为“颜色减淡”,不透明度改为:48%,将画面进一步调亮。同时添加图层蒙版,对天空和人物不需要提亮的部分予以遮盖。
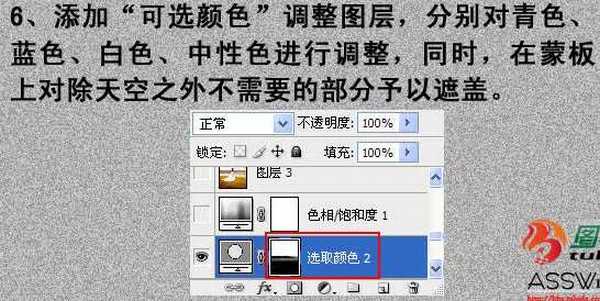
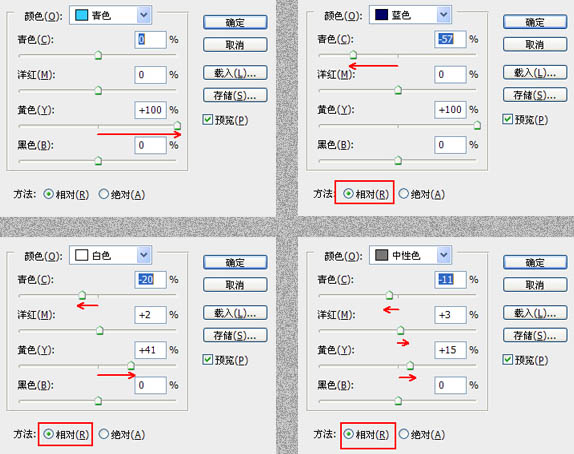
6、创建可选颜色调整图层,对青、蓝、白、中性色进行调整,参数设置如下图。确定后用黑色画笔把除天空之外不需要的部分擦出来。
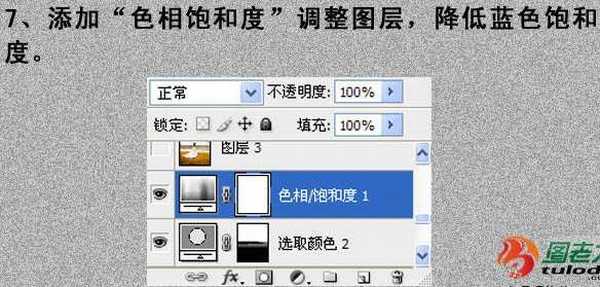
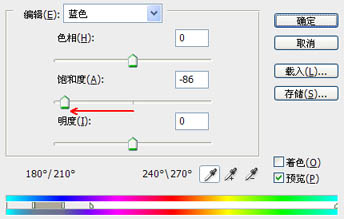
7、创建色相/饱和度调整图层,适当降低蓝色饱和度,参数及效果如下图。
上一页12 下一页 阅读全文

最终效果

1、打开原图素材,创建色阶调整图层,选择自动按钮,简单调整一下明暗对比。


2、新建一个图层,按Ctrl + Alt + Shift + E 盖印图层。执行:图像 > 应用图像,参数设置如下图。目的是加深暗部,拉开天空明暗层次。然后选择由黑道透明渐变,从图层蒙版的下部往中间拉,去除除天空之外不需要的部分。


3、创建可选颜色调整图层,对绿色和黄色进行调整,参数设置如下图。


4、创建亮度/对比度调整图层,将画面稍微调亮一点,参数设置如下图。


5、新建一个图层,盖印图层。图层混合模式改为“颜色减淡”,不透明度改为:48%,将画面进一步调亮。同时添加图层蒙版,对天空和人物不需要提亮的部分予以遮盖。


6、创建可选颜色调整图层,对青、蓝、白、中性色进行调整,参数设置如下图。确定后用黑色画笔把除天空之外不需要的部分擦出来。


7、创建色相/饱和度调整图层,适当降低蓝色饱和度,参数及效果如下图。


上一页12 下一页 阅读全文
兴国资源网 Design By www.nnzcdc.com
广告合作:本站广告合作请联系QQ:858582 申请时备注:广告合作(否则不回)
免责声明:本站资源来自互联网收集,仅供用于学习和交流,请遵循相关法律法规,本站一切资源不代表本站立场,如有侵权、后门、不妥请联系本站删除!
免责声明:本站资源来自互联网收集,仅供用于学习和交流,请遵循相关法律法规,本站一切资源不代表本站立场,如有侵权、后门、不妥请联系本站删除!
兴国资源网 Design By www.nnzcdc.com
暂无评论...
更新日志
2025年02月24日
2025年02月24日
- 小骆驼-《草原狼2(蓝光CD)》[原抓WAV+CUE]
- 群星《欢迎来到我身边 电影原声专辑》[320K/MP3][105.02MB]
- 群星《欢迎来到我身边 电影原声专辑》[FLAC/分轨][480.9MB]
- 雷婷《梦里蓝天HQⅡ》 2023头版限量编号低速原抓[WAV+CUE][463M]
- 群星《2024好听新歌42》AI调整音效【WAV分轨】
- 王思雨-《思念陪着鸿雁飞》WAV
- 王思雨《喜马拉雅HQ》头版限量编号[WAV+CUE]
- 李健《无时无刻》[WAV+CUE][590M]
- 陈奕迅《酝酿》[WAV分轨][502M]
- 卓依婷《化蝶》2CD[WAV+CUE][1.1G]
- 群星《吉他王(黑胶CD)》[WAV+CUE]
- 齐秦《穿乐(穿越)》[WAV+CUE]
- 发烧珍品《数位CD音响测试-动向效果(九)》【WAV+CUE】
- 邝美云《邝美云精装歌集》[DSF][1.6G]
- 吕方《爱一回伤一回》[WAV+CUE][454M]
